Super easy amigurumi chick free crochet pattern
Make This Adorably Easy Amigurumi Chick – Perfect for Beginners!

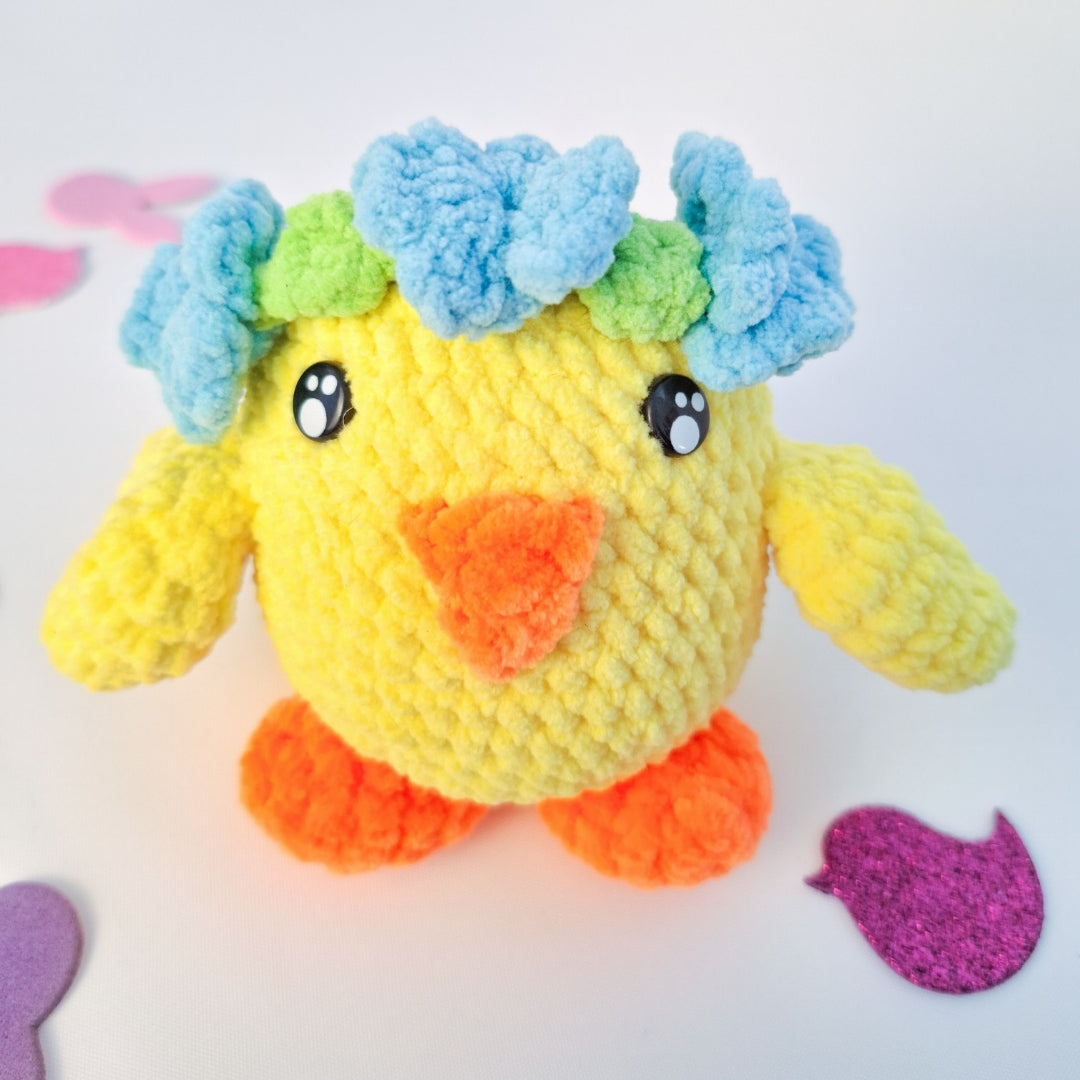
Looking for a quick and cute crochet project that’s perfect for spring (or any time you need a little dose of cuteness)? Meet this super easy amigurumi chick! With its round shape, tiny wings, and cheerful little face, this chick is the ultimate beginner-friendly pattern. Whether you’re brand new to amigurumi or just want a satisfying make that comes together in an afternoon, you’re going to love how simple—and adorable—this project is. Grab your yarn and hook, and let’s hatch something cute together!
You can find a video tutorial for this pattern below
Materials
- Any yarn you like (I used DK chenille) in yellow (for the body and wings), orange (for the beak and feet) green (for the flower vines) and blue (for the flowers)
- A hook that matches your yarn choice - I used a 3mm hook
- Stuffing
- Safety eyes
- Tapestry needle
- Scissors
- Stitch marker
Abbreviations - written in UK terms
- Dc - Double crochet (Sc - single crochet US terms)
- Sl st - Slip Stitch
- Htr - half treble crochet (Hdc - half double crochet US terms)
- Tr - treble crochet (Dc - double crochet US terms)
- Ch - Chain
- Mr - Magic ring
- FO - fasten off
- Dec - decrease by working 2 stitches together
- Inc - increase by working 2 stitches into one
- 3 Tr popcorn - *yarn over, insert your hook into the space, yarn over, pull through (3 loops on your hook) yarn over pull through 2 loops*. Repeat from * to * 2 more times. Yarn Over, pull through all loops on your hook to close the popcorn.
Pattern begins
Head and body - make 1
- 8 Dc in the Mr (8)
- [Inc] x 8 (16)
- [Dc, inc] x 8 (24)
- [3 Dc, inc] x 6 (30)
- [4 Dc, inc] x 6 (36)
- [5 Dc, inc] x 6 (42)
- [6 Dc, inc] x 6 (48)
- Dc around (48)
- Dc around (48)
- Dc around (48)
- Dc around (48)
- Dc around (48)
- Dc around (48)
- Dc around (48)
- Dc around (48)
- Dc around (48)
- [6 Dc, dec] x 6 (42)
- [5 Dc, dec] x 6 (36) Add safety eyes here between rounds 8 and 9 roughly 8 stitches apart. Start stuffing and continue to stuff as you close your chick.
- [4 Dc, dec] x 6 (30)
- [3 Dc, dec] x 6 (24)
- [2 Dc, dec] x 6 (18)
- [Dc, dec] x 6 (12)
- [Dec] x 6 (6) FO leaving a tail to sew the hole closed.
Wings - make 2
- 6 Dc in the Mr (6)
- [Dc, inc] x 3 (9)
- [2 Dc, inc] x 3 (12)
- [Dc, inc] x 6 (18)
- [2 Dc, inc] x 6 (24)
- Dc around (24)
- [2 Dc, dec] x 6 (18)
- [Dc, dec] x 6 (12) FO leaving a tail to sew to the body
Feet - make 2 in orange
- 6 Dc in the Mr (6)
- [Inc] x 6 (12)
- Dc around (12)
- Dc around (12)
- Dc around (12)
- [Dec] x 6 (6) FO leaving a tail for sewing to the body
Beak - in orange
- Ch 4, turn
- Dc in the second ch from the hook, Htr in the next ch, Tr in the next ch. FO leaving a tail for sewing to the body.
Flower crown
Flowers - make 3 in blue
- Work all instructions into the magic ring.
- [Ch2, Htr, Htr, ch 2, sl st] x 5. FO
Vine - in green
- *Ch 8, turn, work a 3 tr Popcorn into the 3rd Ch from the hook* repeat from * to * 4 more times. Ch 8, FO.

Construction
- Sew the feet to the body at the bottom aligned under the eyes and turning out slightly.
- Sew the beak in-between the eyes 1 round down from where the eyes sit.
- Sew the wings in line with the beak on the sides of the body.
- Tie the flowers to the Vine in your desired pattern. Tie the crown to your chick, you can sew in place if you wish.

Your chick is now complete!
